Biscuits

There is something magical about fresh biscuits.
It starts with the process, the very beginning, when the fats start to mingle with the dry, and the milk binds everything together. The scent begins to develop, from the leavening agent and the liquid, and the butter as it breaks down. Your hands warm the dough, and you see the solids and the fats lace together and apart with the rolling of a wooden pin.
Chill and warmth, opening up little molecules of water and fat that surround dry ingredients, and then chemistry takes over. Into a hot oven, about 10 minutes in the scent develops and moves from hot box to kitchen, then makes it's way into the air we breathe, around corners, up stairs.
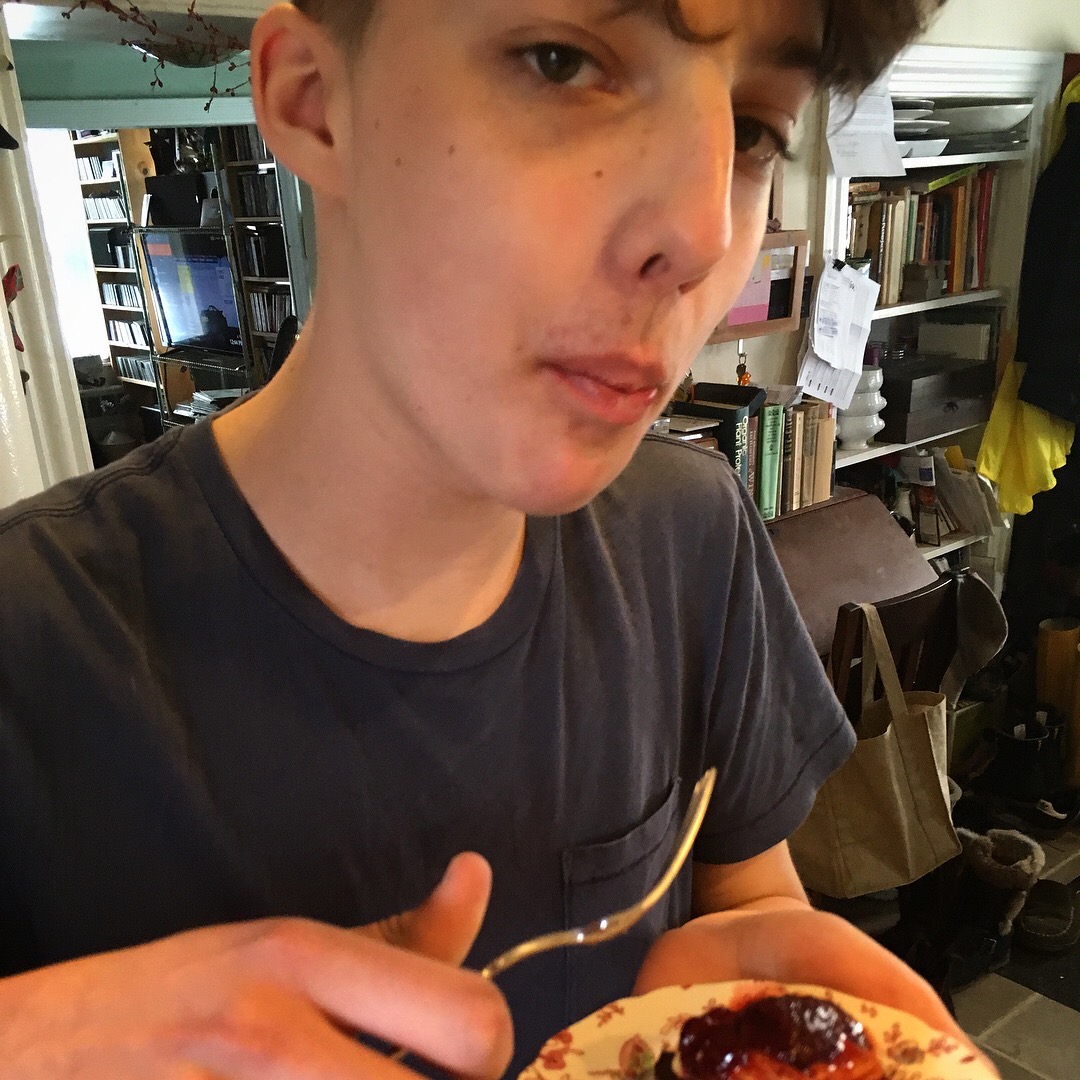
And then, the moment everyone has been waiting for, the first bite. With or without a piece of curled butter topped with a dollop of honey, or a thick slice of sharp cheese, the first bite closes eyes with the burst of flavor and a flood of memories. So many different points in time, yet each moment the same, the first bite of a fresh, hot biscuit.
There is something magical about fresh biscuits.
Here are two versions, the Basic Baking Powder, and the Buttermilk, and included Our Favorite variation of the Basic. I have lived my life with these biscuits, and raised my sons on them. I modified a basic recipe from The Fannie Farmer Cookbook (after checking two different editions), which I think does not get enough recognition in the food world. So many people reference The Joy of Cooking, but I do not think there is a better First Cookbook than The Fannie Farmer Cookbook. Even if they did eliminate Denver Chocolate Pudding.
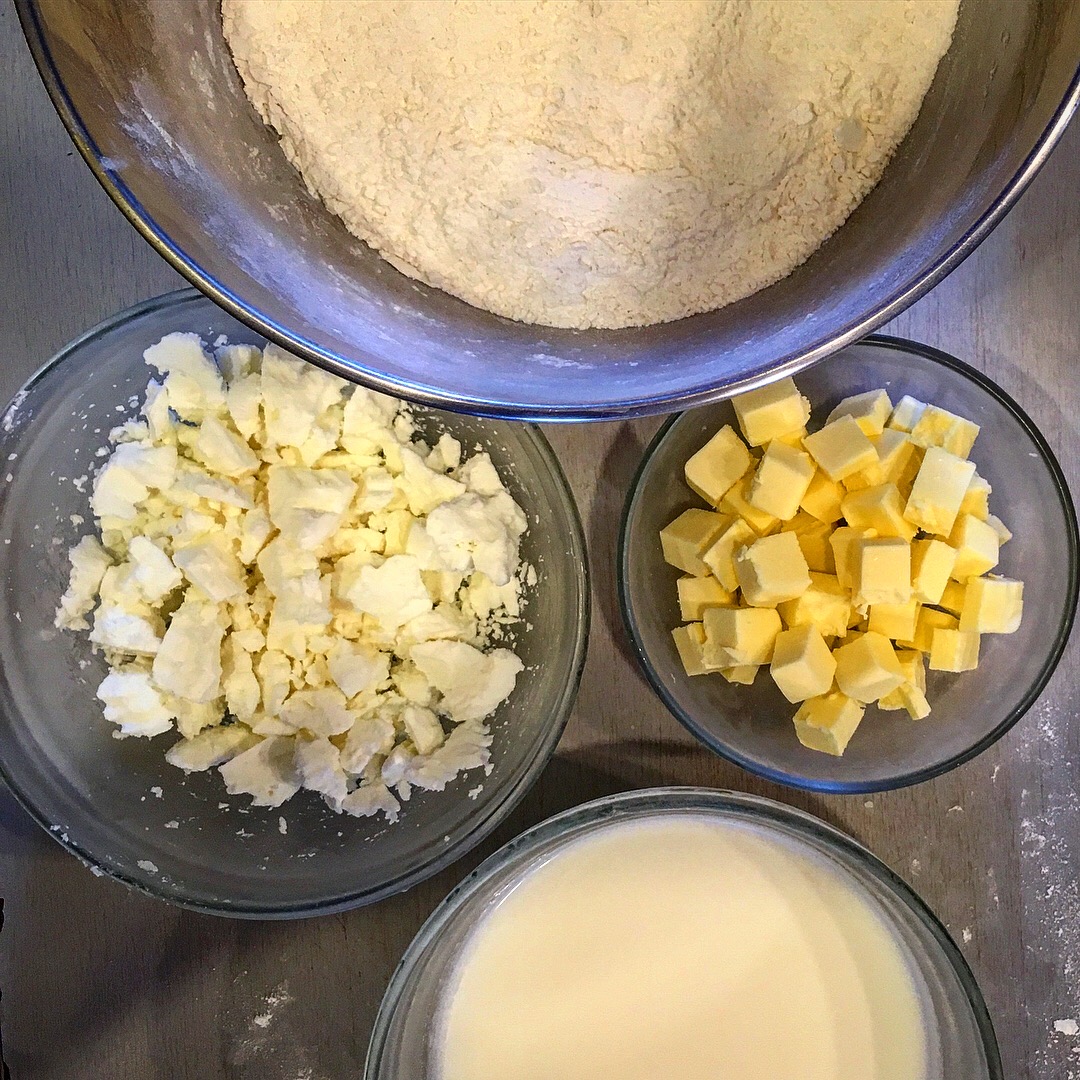
Ingredient notes: I only buy and use Spectrum Organic Shortening. It is unsurpassed in texture and flavor. I also keep it in my fridge. I like my shortening very cold, unless it needs to be melted. Use a Dinner Fork to flake it out of the container for weighing. To cube Stick Butter: cut in half lengthwise. Give one quarter turn on side lengthwise, two cuts into thirds, then cut in tablespoon measures. This will give you 6 pieces per tablespoon. This is my preferred size for cubed butter. I also only use organic ingredients, and we have been living off raw milk for well over a decade. Sometimes the milk can have more or less fat, and the flour can require more or less liquid, for various reasons, so you may need to add more, or require a little less, depending on your milk and flour. There are a lot of variables to working with flour, so use your best judgement.
Equipment notes: Buy a kitchen scale and use it. It is a game changer.
Basic Baking Powder Biscuits
4 c (20 oz/560g) All-Purpose Flour*
1 tsp (.2oz/6g) Salt
8 tsp (1.2oz/32g) Baking Powder
2 tbl (1oz/27g) Sugar
½ c (4 oz) Shortening, Flaked
½ c (4 oz) Butter, Cubed
1 ½ c (12oz) Milk
Buttermilk Biscuits
20 oz/560 g All-Purpose Flour*
.2 oz/6 g Salt
.6 oz/16 g Baking Powder
.2 oz/6 g Baking Soda
1 oz/30g Sugar
4 oz Shortening, Flaked
4 oz Butter, Cubed
12 oz Buttermilk
Our Favorite Baking Powder Biscuits
*Use 16 oz All-Purpose Flour and 4 oz Whole Wheat Pastry Flour. All other ingredients are, and process is, the same as written for Basic and Buttermilk.
Optional
Egg Wash
1 Egg
1 tsp water
or
2 tbls Clarified Butter
Coarse Salt or Raw Sugar to finish
Useful Items: Kitchen Scale, Pastry Blender, Pastry Fork, Plastic Wrap or Coated Butcher Paper, Parchment Paper
Oven at 425F
Combine Dry Ingredients, Flour, Salt, Baking Powder, and Sugar in large mixing bowl. Mix thoroughly. Add Shortening and Butter to dry ingredients. Cut in with two knives or pastry blender until the fats are chickpea size and well distributed. I keep my fats in larger pieces than most recipes call for. I like the larger pockets that the larger pieces create.
You can mix in a stand mixer, if you like. I have used my hands, a squiggly masher*, a pastry blender, and my Kitchenaid stand mixer to see what happens. My personal preference is my squiggly masher, or pastry blender. Use whichever method you prefer to mix, but you must follow the directions below for turns.
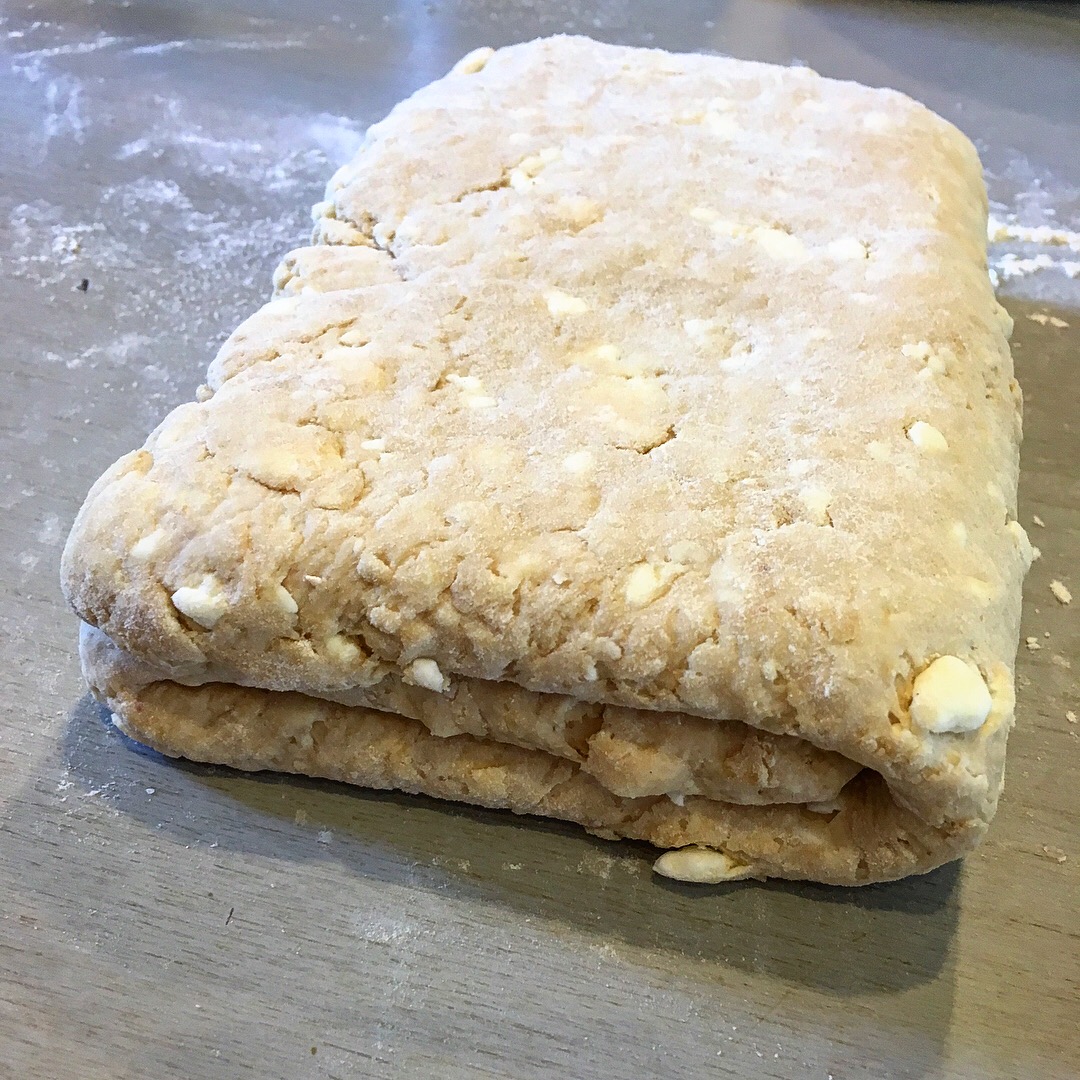
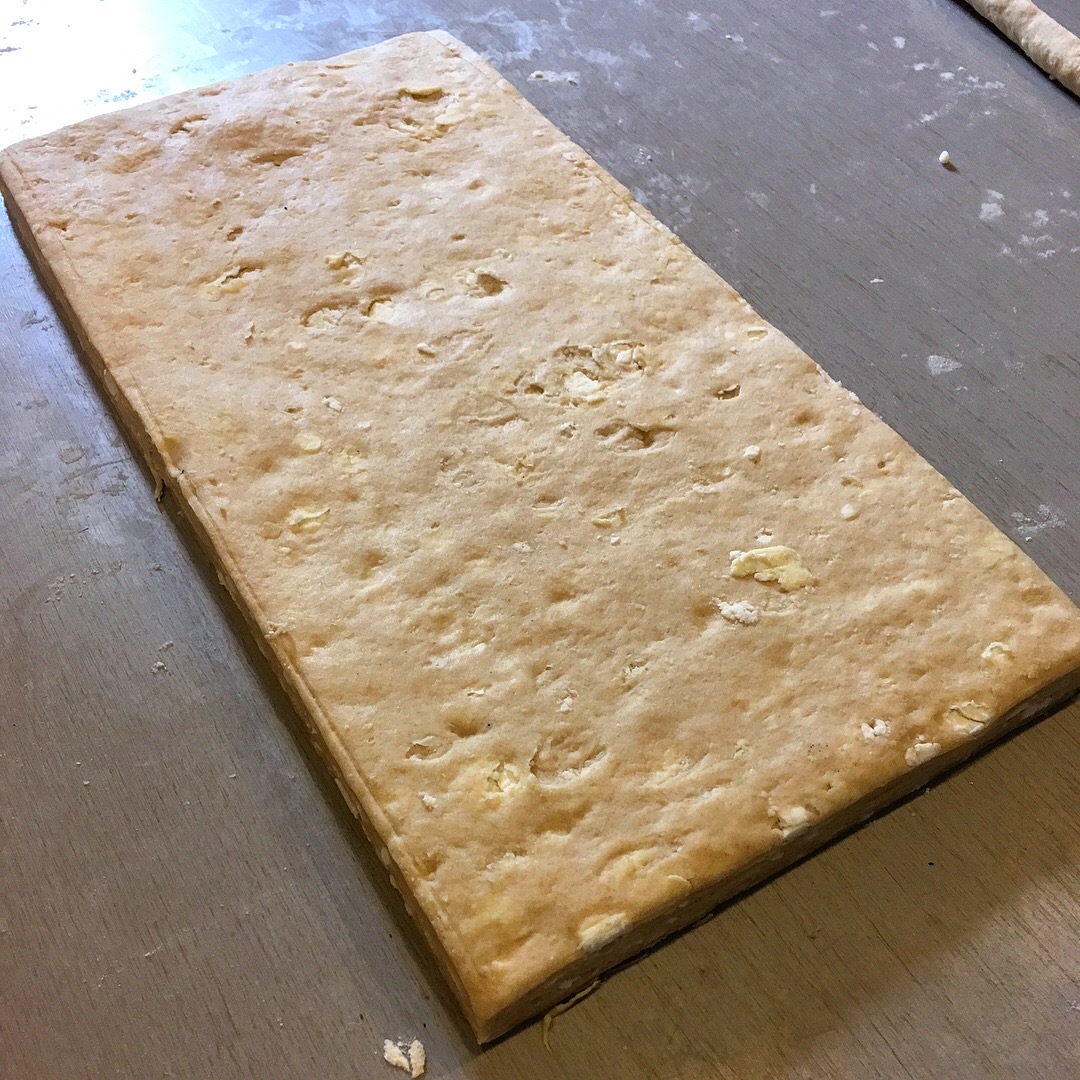
Add milk all at once and stir with Pastry Fork, or other large sturdy fork, just until the dough forms a ball around the fork. Turn dough out onto lightly floured board, bring together in a mound, then form into a rectangle. You are not going to knead the dough, because the rolling process replaces the kneading process. Wrap in plastic wrap or coated butcher paper and refrigerate for at least 30 minutes in the coolest part of your fridge.
Remove dough from fridge. Unwrap and roll dough out in a rectangle. Fold in thirds, give dough ¼ turn, roll out again. Fold in thirds again, press it down firmly, wrap in plastic wrap or coated butcher paper, refrigerate for at least 30 minutes. Repeat: roll, fold, roll, fold, wrap, refrigerate. This will be a total of 4 folds or turns. You can repeat this procedure one more time, if you like, for a total of 6 folds or turns.
Remove dough from fridge and roll out to ¾ inch thick. Many recipes state ½ inch, but I like mine a little higher.
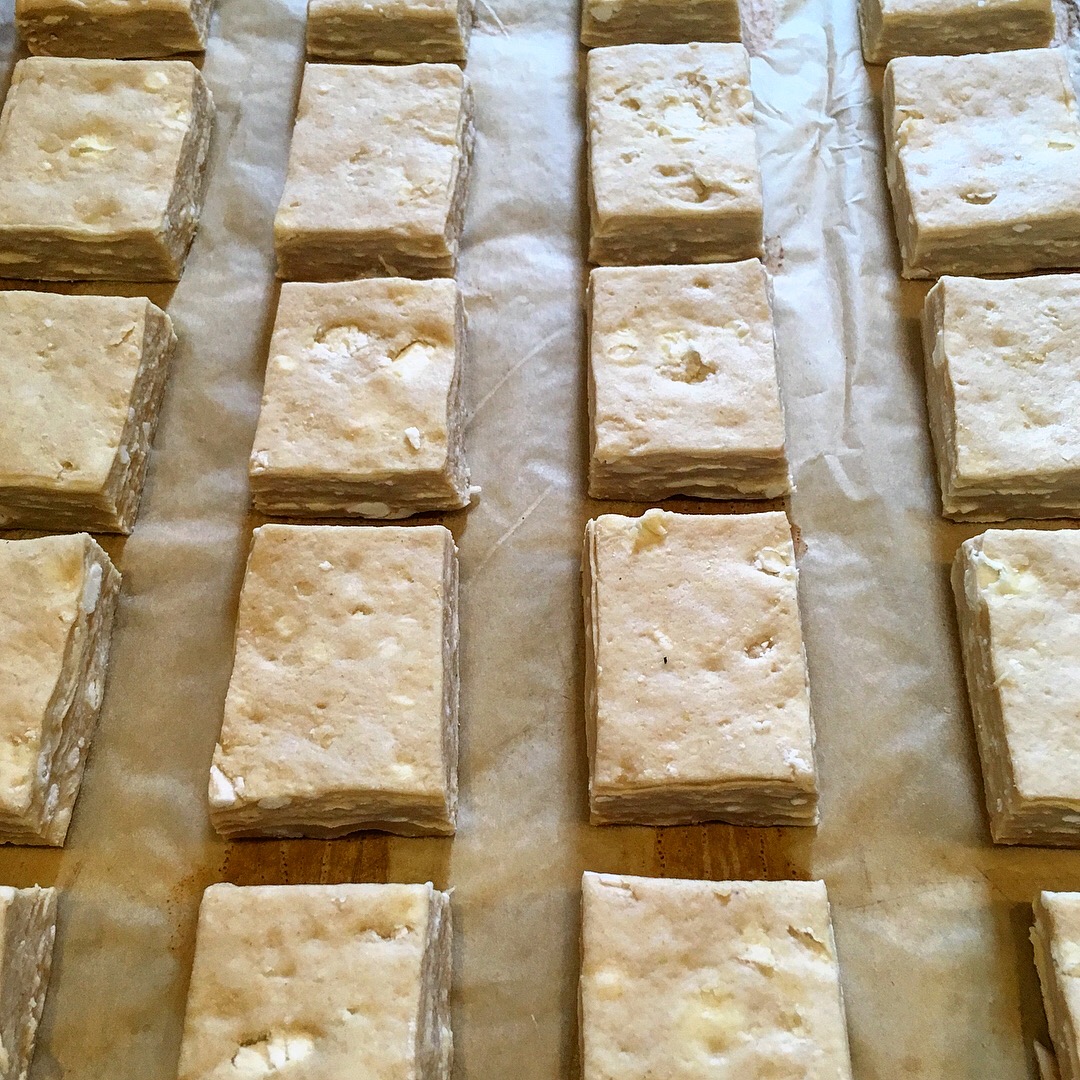
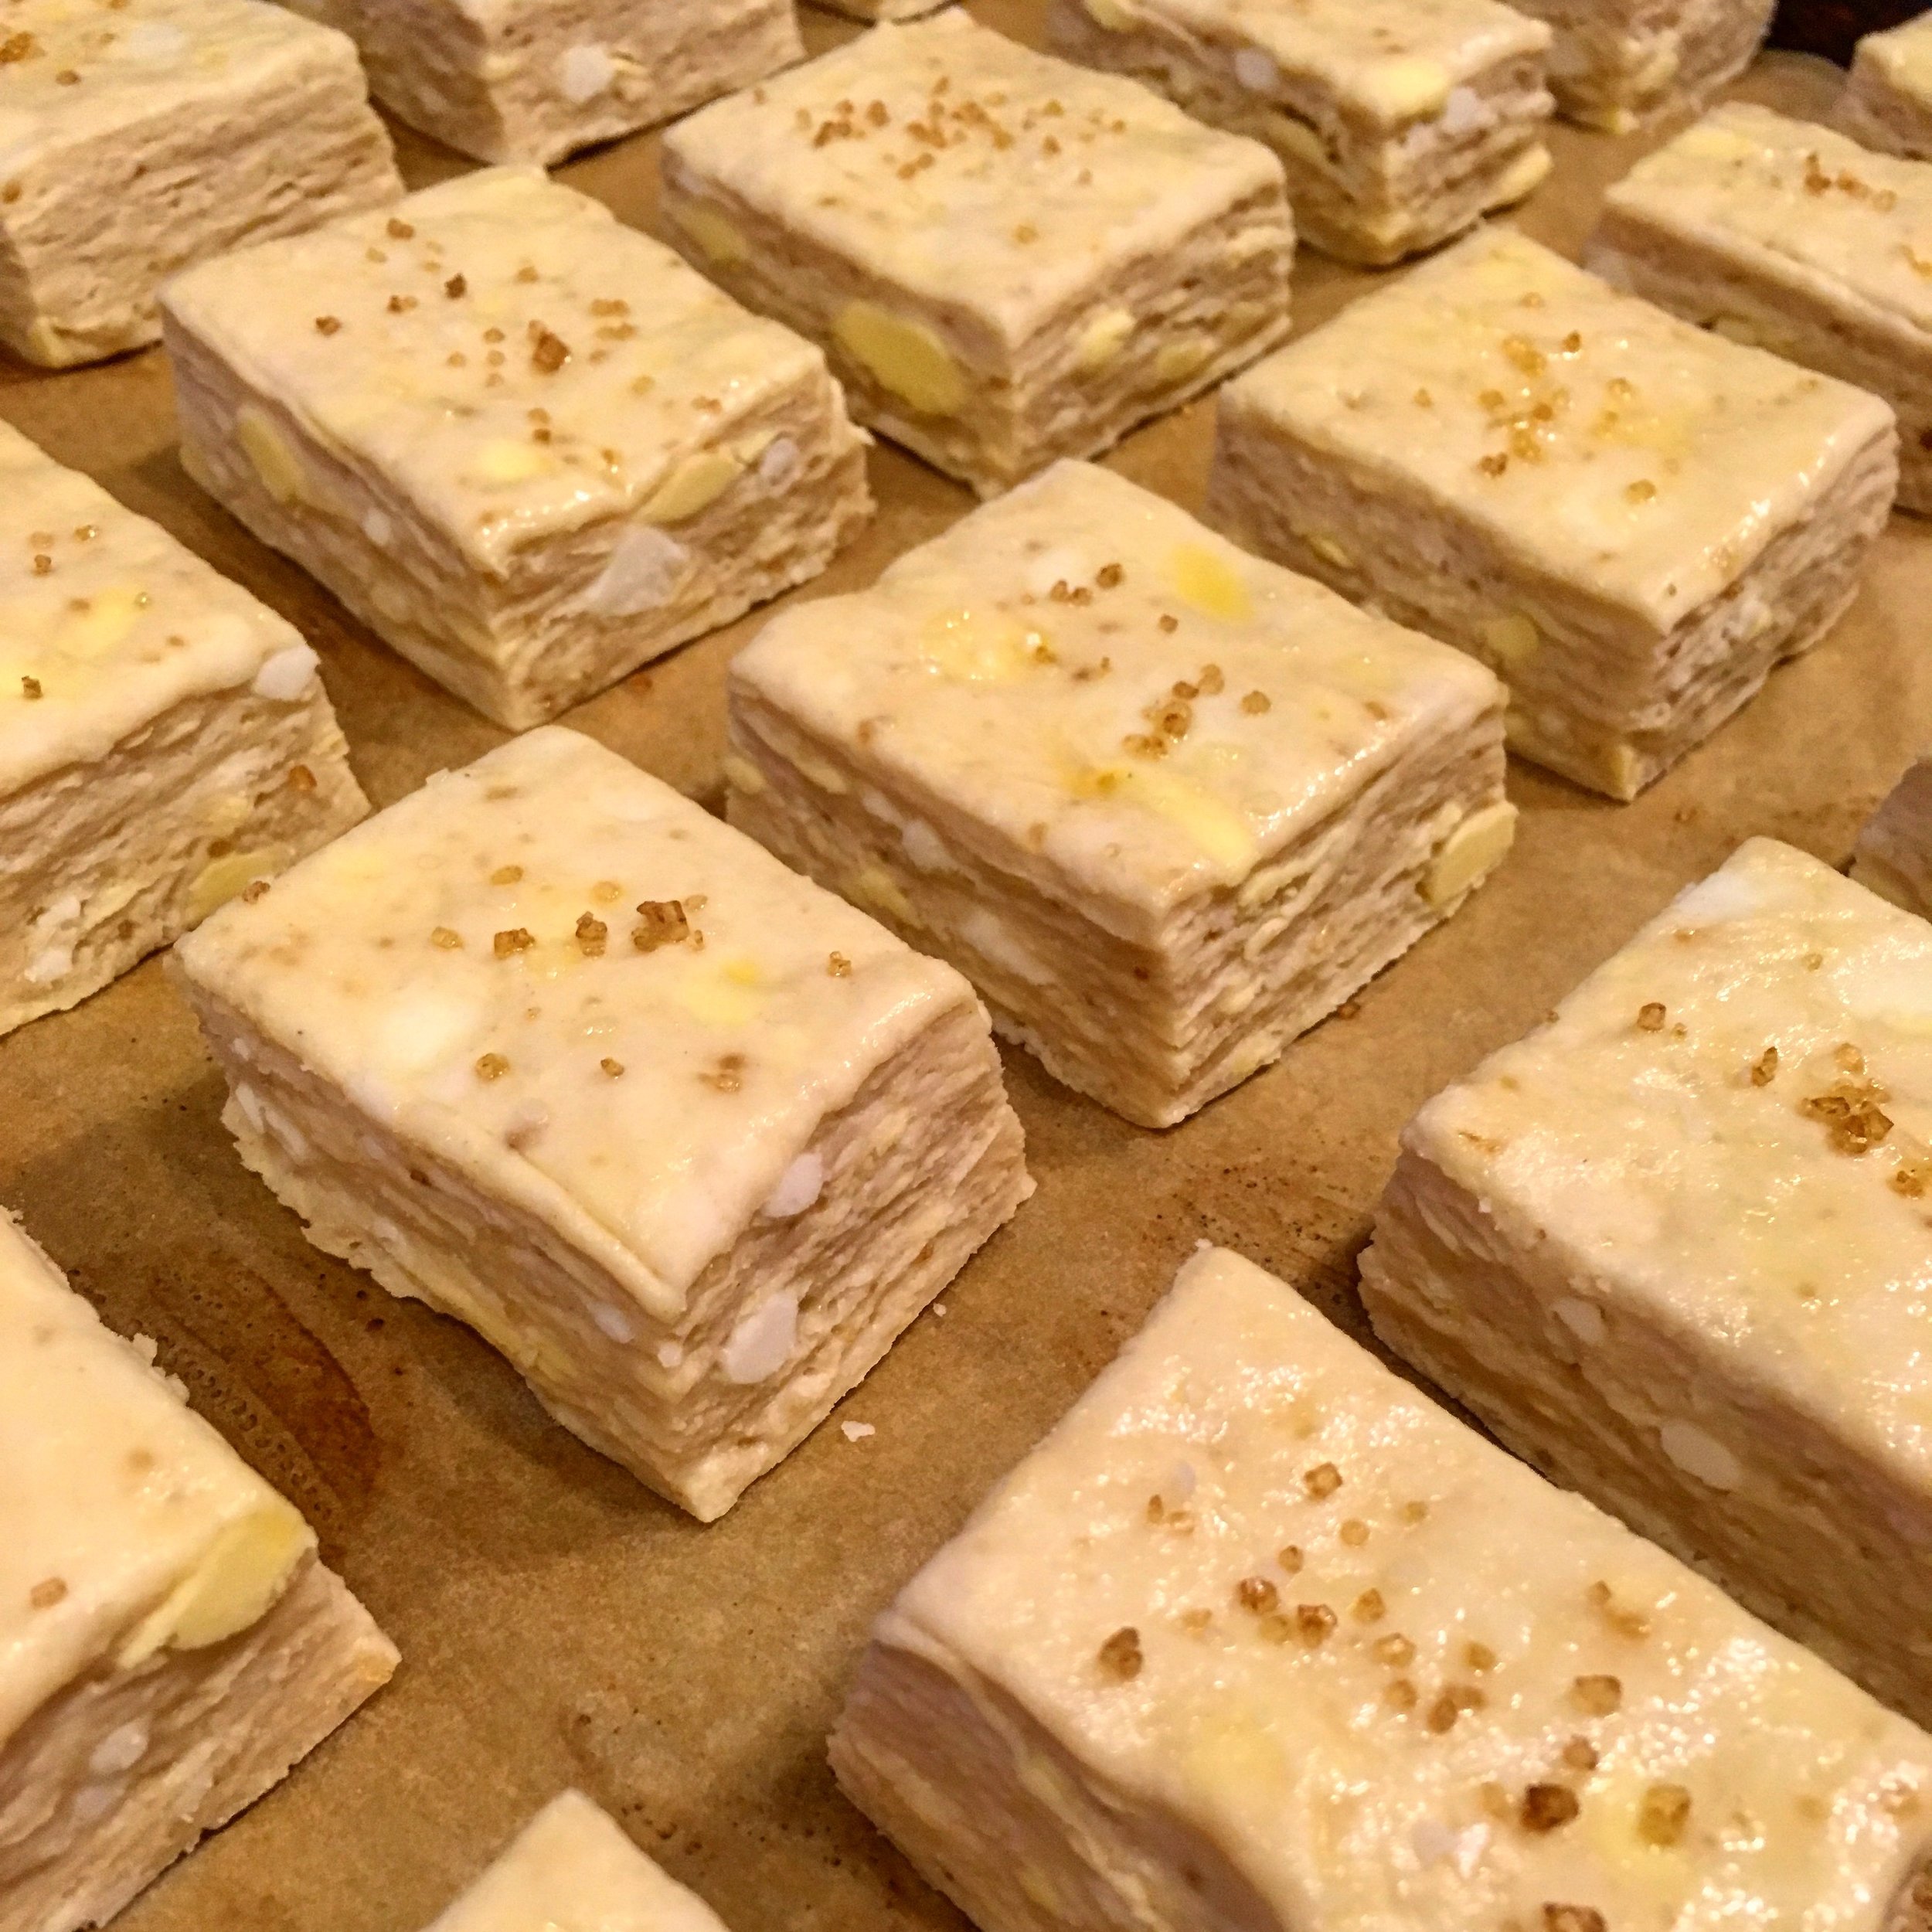
Cut out biscuits with a very sharp knife for squares, or a ring cutter for rounds. I prefer squares, because there is less trim, and I prefer the square shape to the round. Cut the edges of the large rectangle of dough before cutting out individual biscuits. Roll trim into biscuits.** Place on parchment lined baking sheet and apply egg wash or clarified butter with pastry brush, then lightly sprinkle with coarse salt and/or raw sugar. I prefer the egg wash to the clarified butter. I much prefer the color and texture from the egg wash to that of butter, but this is a very personal preference. You may also omit the sprinkling of coarse salt and/or raw sugar, but give it a try. At least once.
Bake at 400F for 15-20 minutes, until the scent has moved throughout your home, and the biscuits are a beautiful golden brown.
*Pretty certain it is a Potato Masher, but I like referring to it as the Squiggly Masher. Everyone immediately knows which one it is.
**Note on cutting out biscuits: Roll dough out into a rectangle about 14-inches long by 6.5-inches wide. You should have a thickness of ¾ inch with these dimensions. After trimming, you should have a clean rectangle 13.5-inches long by 6-inches wide. I have found this to be a good size to work with. For smaller biscuits, cut in (5) 2.75-inch increments lengthwise, and (3) 1.5-inch increments widthwise. This will produce 24 small biscuits. Roll trim up into little swirls, and you will get an additional 4-6 super cute biscuits. I like smaller portions of food, so I really like the smaller biscuits on the regular.The trim can be rolled into little rounds, and then baked as regular biscuits. These are pretty cute, too.
This Biscuit can be savory or sweet. Play around with salts and sugars to taste how the flavor changes. Add dried herbs and seasonings, or grated cheese. This is a very sturdy biscuit, open to almost any idea you can think of. You could even:
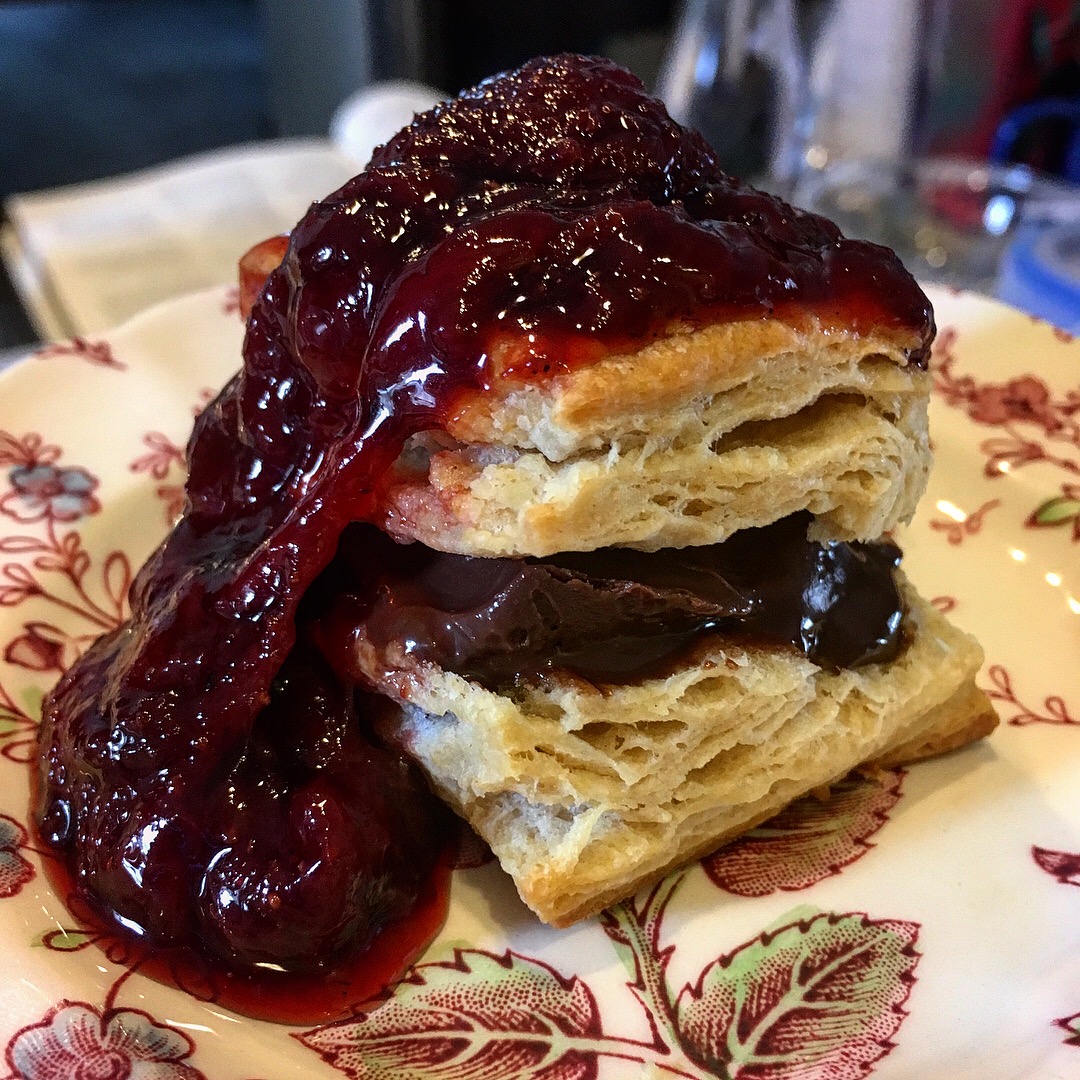
Fill one with Bittersweet Ganache and blanket it with a Strawberry-Tarragon Sauce. Mmmmmm. I think I finally figured out my 'Strawberry Shortcake' recipe. Bug approved.
Cheers.